Before trying to remove visible mold stains. One must make sure to find the source of the problem by doing a full mold inspection to find the source that is causing the mold. So a quick overview of inspection protocols will be first. Then the next steps will be to start mold remediation protocols. If you know the source of problem and fixed it, by all means skip the inspection and begin the remediation process below.
Inspection Procedures
To simplify the inspection process below are areas you will want to review for possible water damage. If you find water damage or visible mold, you will want to dig deeper to discover the source of where the water came from.
Inspect Baseboards
If you notice your baseboards have water stains that means something has leaked in or around those areas. This could be from a washer machine, dish washer, pipe leak behind the dry wall, or even a leak coming from within a door.
Check Drywall For Water Stains
If you notice water stains around the dry wall this could be a leak from behind the wall due to plumbing (shower, sinks, etc). This wet drywall will sooner or later cause mold and mildew.
Check Windows & The Sills
A popular place for water damage is around the window framing from a leak in the window area. This can also cause mold and mildew.
Check Ceilings / Attic / Basements
A popular moist problematic areas can be the basements, attics, and ceilings. If you start seeing water stains on the ceiling you may have a roof leak and need to check within the attic for the source of the problem. If your basement has water damage be sure to check if their is some plumbing causing the leak or issue.
Check Tubs / Showers For Leaking
A great way to see if a tub or shower is leaking is to tape the drain with electrical tape and then fill it up with water. See if the water goes down. In some cases the grout can crack and this can cause water damage all the way around the shower areas hitting adjacent locations in your project.
An entire home inspection is recommended and you will want to find the source of the problem. This is the goal. The above locations are standard locations to inspect.
Remediation Procedures
When doing a mold remediation you will want to ensure you are using the proper safety gear, such as your NIOSH mask, eye protection and even a Hazmat suit to not transport any spores.
With that said… here is something to consider:
Remove any heavily water damaged materials A good rule of thumb is remove 3ft beyond the last visible trace of water damage. Take these water-damaged materials and throw them in a poly plastic bag and seal that bag to not expose spores into other areas of the project.
If Your Wall Cavities Are Exposed: In some remediations they will remove the dry wall and leave the inner cavity of the walls exposed. This is a good time to remove any wet insulation and clean the inner walls and furring “wood” strips with Molderizer.
Consider HVAC Cleaners:
If you have a large mold remediation project you may wish to consider to use Negative Air by sealing the A/C vents and containing the area with plastic/poly and electrical tape. Then turn on your HVAV with filters to clean the project area to pass a mold clearance test. The negative air setup will remove any mold spores that may hinder your mold test. This also ensures the remediation project is approved by a mold inspection or CMT (certified microbial technician).
Using Molderizer & Safe Shield
Your inspection should be completed so you know the source of the problem.
If there was heavy water damage you would want to do a mold remediation to remove those wet damaged materials.
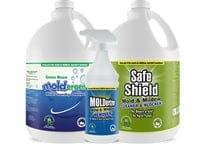
During this process is when Mold Remediation Professionals use our unique formulations called Molderizer and Safe Shield. Below is how our mold professional clients use them during their mold profects.
Use What Professionals Use...
Contractors and Facility Managers
To ensure you remove all mold stains and mildew stains. Remediation professionals and the IAQ(Indoor Air Quality) industry use Molderizer. The formula can be used on any surface, in the A/C system and requires no evacuation (which is great during mold remediation projects).
Spray Molderizer on Surfaces or A/C System / Duct Work
Allow Formula to Dry & Brighten Surfaces
Wipe Off with Cloth or Cleaning Brush
Repeat steps 1 thru 3 again to ensure the areas are cleaned for a final cleaning.
Use What Professionals Use...
Contractors and Facility Managers
To ensure you protect your surfaces and seal them as well as continually clean them. Professionals use Safe Shield which is a mold stain cleaner and sealer to keep mold spores from releasing into the air as well as protect surfaces from re-appearing of mold stains and mildew stains.
Spray Safe Shield on Surfaces or A/C System / Duct work
Allow Formula to Dry onto Surface
Do a one-time cleaning if needed
Then re-apply and allow the formula to protect surfaces
Loved By Our Customers
Every time I used "Molderizer" to remove the mold from the properties after cleaning the entire place we applied the sealer "Safe Shield". We never failed in any test. All the mold test have been very successful with your products.
C William Hamilton-Inspection Wizards LLC
A real estate inspector whose been customer since 2014